All posts by Mr Chops

Confirmed Elgrand fanatic, and a bit of a geek.

So I put the navigation DVD in the drive and…

When I bought the bus the Navigation DVD was in the drive and it was just a bit annoying the way Navigation automatically started when the key was turned. Not only is the disc from 2003 but it only covers Japan. Everything is in Japanese and only of any use if you’re driving in Japan, which I’m not. The disc has been in the glove box for the last six months.

I just fancied popping the disc in today and have a bit of a play.

A red triangle appeared just off the coast of somewhere in Japan but I haven’t got a clue which part of the country it was thanks to the Japanese labels. It did rotate as I drove though. So that’s not very interesting.

Wait…I just saw a route finish marker across the map, and further in the distance another marker that could be Home or Start. Could these be set for the last trip the bus made before leaving Japan? Maybe it’s when it travelled to Nagoya to the auction?

When I got home I loaded up Google Maps on my phone and worked out how to move the map around on the Navigation screen. Rotating the map to North I realised that both Start and Finish were in Toyama Prefecture. I knew from the bus’s Japanese registration plates that it was registered in Toyama. I wondered then if this was the owner’s last trip in it, maybe to go and pick up a nice new motor the Elgrand would be taken in part exchange for? So many questions!

Zooming in on the Finish marker showed that the destination was a car dealership called ‘Gulliver’, just off the Etchu-Higashi Highway.

destination2

gulliver

You can have a look around the place here.

gulliver1

What about the other markers? I guess that ‘S’ is the start of the route and not far away is the ‘Home’ marker. home

The map from 2003 doesn’t show a row of houses adjacent to the markers.

home2

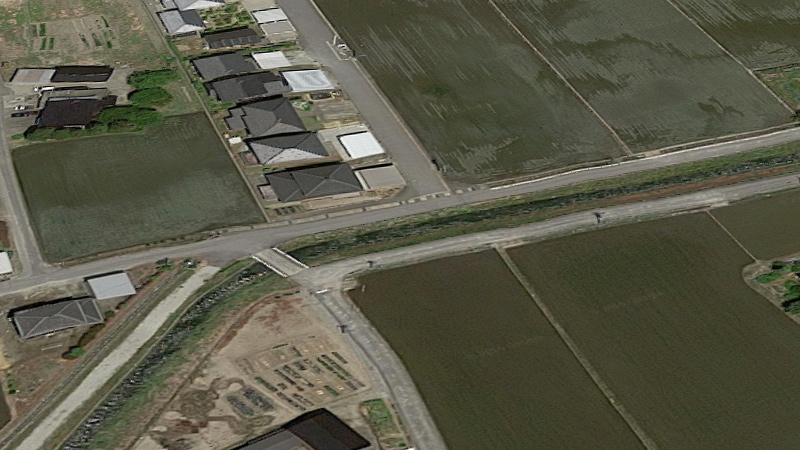
Google Maps shows that the end house is closest to the marker that looks like a building. I’d think this is most likely to be the previous owner’s house.home3
home4

Google map’s imagery for this area is from 2014 at the time of writing this and it’s a shame the Elgrand can’t been seen in the surrounding area.

Loading

Sumvision Cyclone Micro 4

I recently bought a Sumvision Cyclone Micro 4 multimedia player so that we can watch movies from SD/USB/HDD if out on a long trip.

[IMG]

This thing is pretty small and neat so here are my pro’s and con’s (so far):

Pro’s

  • Small
  • power, AV out, optical out and HDMI connectors are all at the back
  • Powered by USB, comes with a mains plug and cable
  • Simple interface and controls
  • Remote control (ir)
  • Plays a lot of file formats
  • NTSC or PAL
  • Miracast and many more features

Con’s

  • SD card slot and USB port are on the side, limiting where it can be mounted. The front only has the ir sensor so I’m sure there would be room
  • Auto-on when powered up, stopping the Pumpkin playing music etc through the rear audio channels. A con for me but may not be for you
  • Curved bottom could make mounting to flat surfaces trickier
  • Generates noise through the AV IN line, making annoying buzzing sounds when navigating the menus
  • Can’t power up a 2.5″ laptop HDD, would need externally powered drives

I managed to fit it today and whilst doing so found a problem with my bus’s AV.

Previously I had just run a single RCA (yellow) to the middle row socket so that the Pumpkin could output video to the bus’s screens and drive the speakers itself. Worked fine, but with the Cyclone I thought I’d try to connect it directly to the sockets independently of the Pumpkin. Found that no matter what I pressed up front or on the AV remote I could get no sound from the speakers. The Cyclone was playing sound fine as I’d just connected it to the Pumpkin’s AV IN.

So my plan to just put the Cyclone in the back somewhere and plug it in when required went out of the window.

Now I have it connected to the Pumpkin’s AV IN plugs, and it works on all three screens. I’ve moved my camera feed to ‘CAM IN’ but it needs 12v to the reverse wire to switch to that input so connecting that to my video mixer’s trigger switch is a job for another day.

I removed the multiple power feed unit from the middle drawer in the console and put the Cyclone in there.

[IMG]

[IMG]

The wires come through the back of the drawer, along with the Pumpkin’s USB/iPod connectors. The power wire and my dashcam power wire both come through under the centre console.

I’ll sort out the position of the power unit soon, or come up with some solution that has several USB ports flushed with a panel.

My first job today was actually replacing the single AV cable with a three way cable which has now been a waste of time (unless I can work out what the heck is causing no sound to be played from that port).

Strangely whilst doing all this the only controls on the bus’s AV remote that work now are volume and power. I’ve lost the rear screen tilt adjustment and who knows what else that was working when I last used that remote.

Loading

3D Printing accessories

I’ve not done a lot else to the bus recently that involves going outside. I did see an advert on Facebook for a phone mount that pushes into the CD slot in the head-unit.

But why would I buy one of those when I have a 3D printer! I measured the Pumpkin’s slot size and check around it for any obstructions, then knocked up a design that is tailor made for my phone. I printed the first test with some PET-G I have been using but fancy doing a black one next.

[IMG]

The angle of the head-unit is perfect for the phone which sits quite snugly in the holder.

I would have taken a photo with my phone in it, but that was the only camera to hand.

Although the first attempt came out ok I wanted to make a black one to fit in better with the dash. The PLA printed a lot nicer than the PET-G.

[IMG]

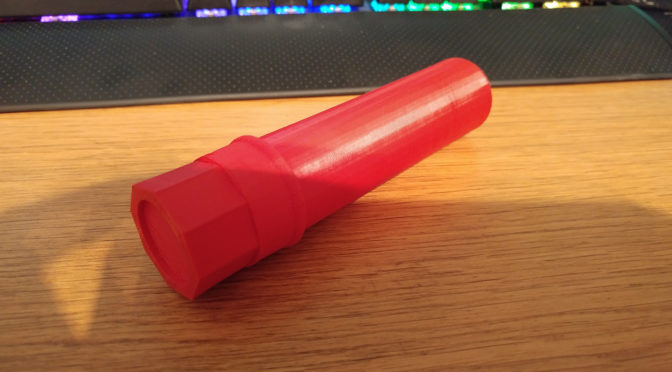
And seeing as the road flare was removed in Japan I decided to print a replacement. This was modelled in Tinkercad in two pieces. It’s hollow and the top comes off so that it can hold stuff.

[IMG]

[IMG]

A zipped .stl file of the flare is available here. I modelled two different styles of cap, both found in Japanese cars.

Loading

New fob programming

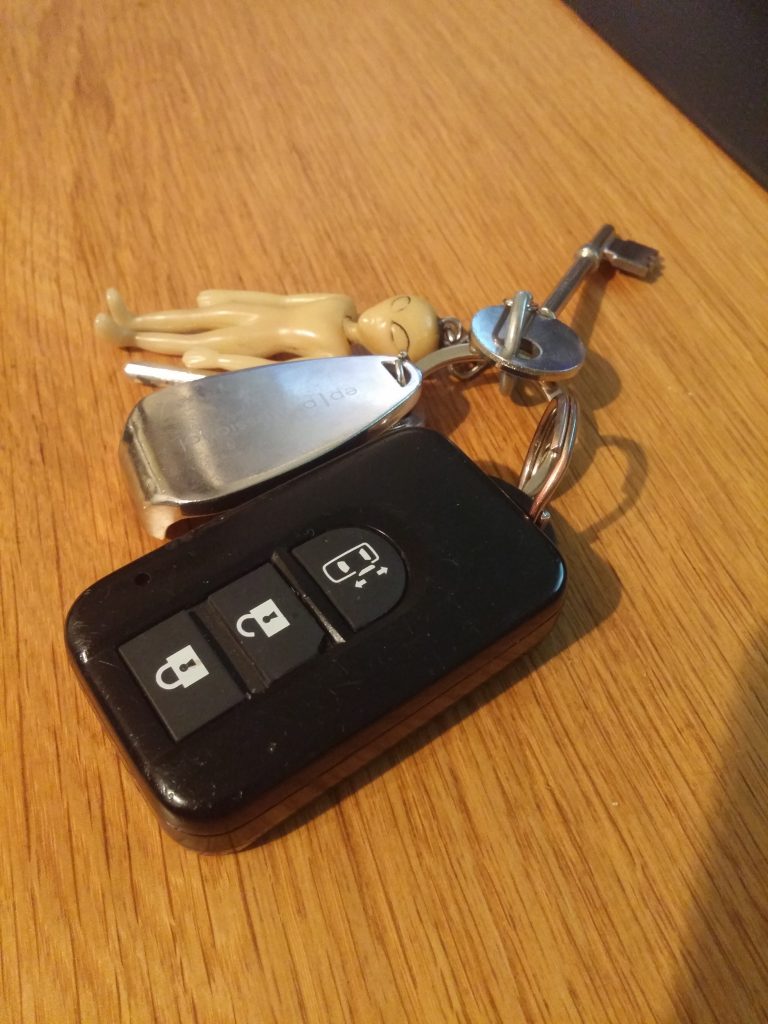
The bus only came with one key so without any fobs I’m missing out on the keyless ignition benefits. Recently I managed to pick up a blank key blade with a chip as well as a used fob for not a huge amount of money (certainly a lot less than a main dealer would charge).

My Silca programmer came today so I plugged it in to the OBD2 port and paired the fob to the immobiliser. Took all of three minutes to do it.

I’ve found that by locking the bus with the fob or the button on the outside of the door it automatically folds in the mirrors too. They unfold when the ignition is turned to ACC. Sweet!

So now I don’t have to use the key anymore and it’s safely tucked up in the fob.

Fob

Loading

First road trip complete.

Just back from a week staying at Forest Holidays’ Strathyre cabins in Scotland and I have to say the Elgrand was absolutely perfect for the trip.

With the rear two seats removed there was more than enough room for four of us and all our luggage (even enough room for three girls’ shoes and clothes!).

It pulled well and had no problems with the hills we encountered, either going up or coming down them.

Over the course of the whole journey it averaged 8.6 km/l, which is about 24mpg. Pretty good for how much weight it was hauling.

Parking was easy with the rear reversing camera.

So overall I’m really pleased with it and it was the perfect vehicle for the trip.

Tigh Mor Trossachs

Loading